
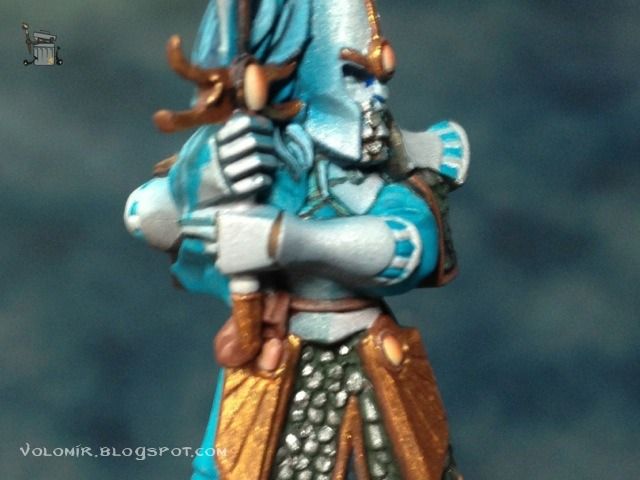
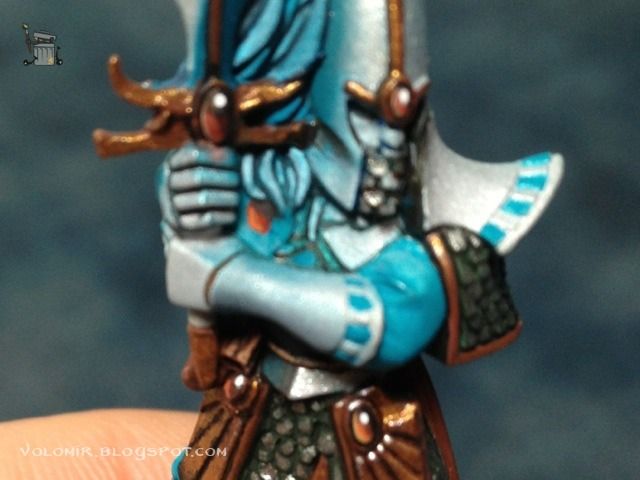
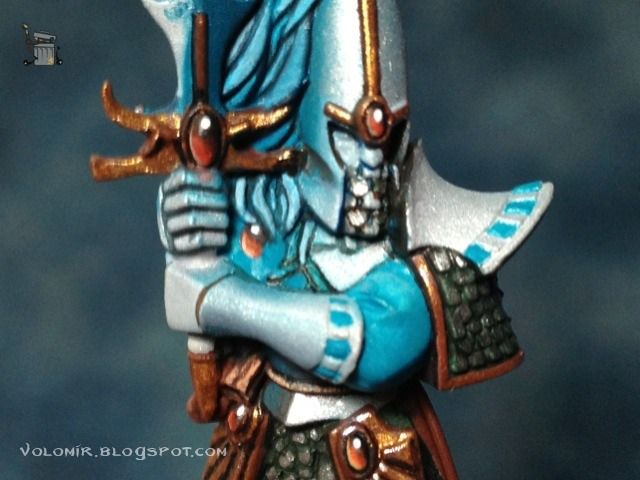
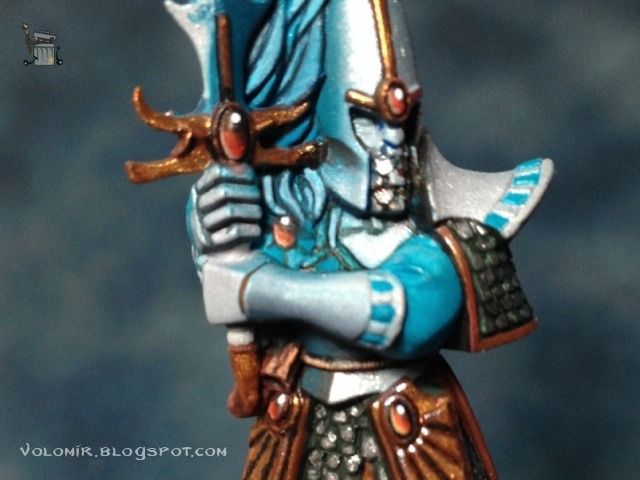
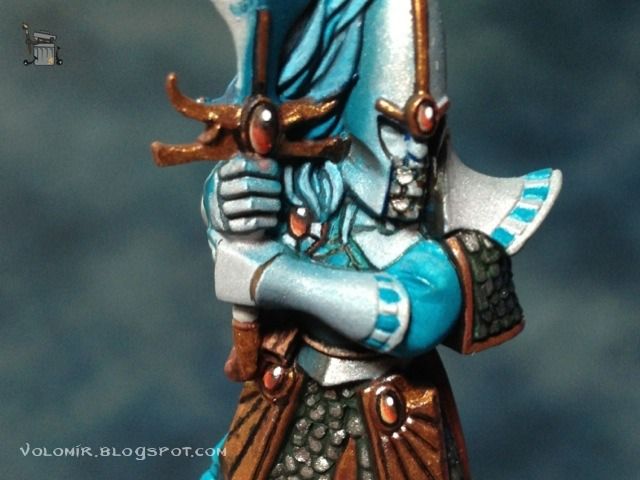
Now it's time to start dedicating my effort to painting details. I'll start with the hair, which was previously airbrushed for basecoat, lights and shadows. I am going to increase the contrast and outline a little bit. In the next three photos, the only changes you will see are around the blue hair area.
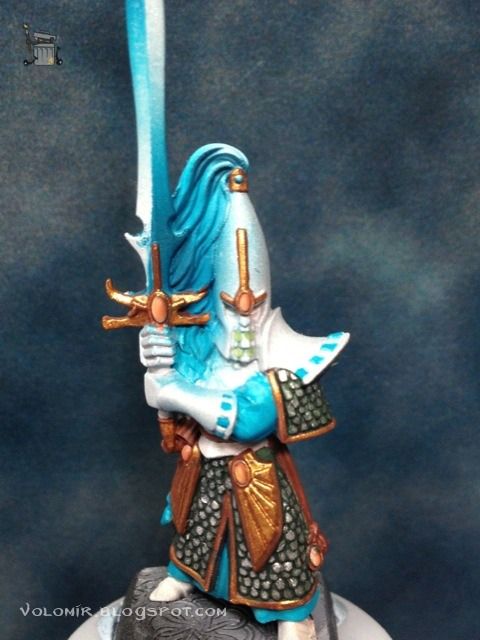
Increasing the shadows with navy blue and some blue, green and black inks in different proportions.
The lights will also be pushed up, but introducing Space Wolves Grey.

That would be all on the hair. At this point I am going to show how I work on the metallic parts with brush.
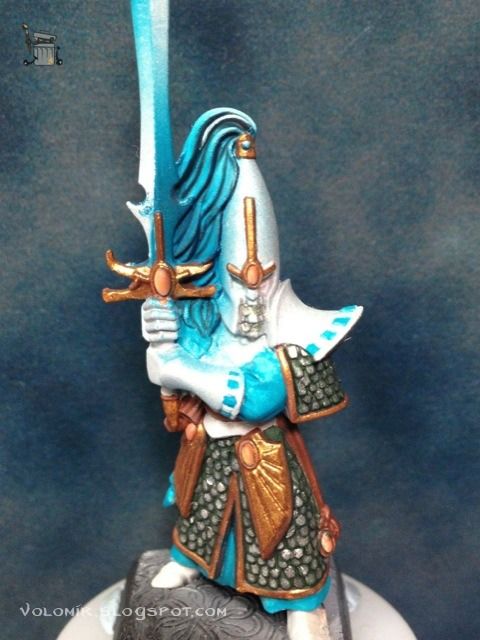
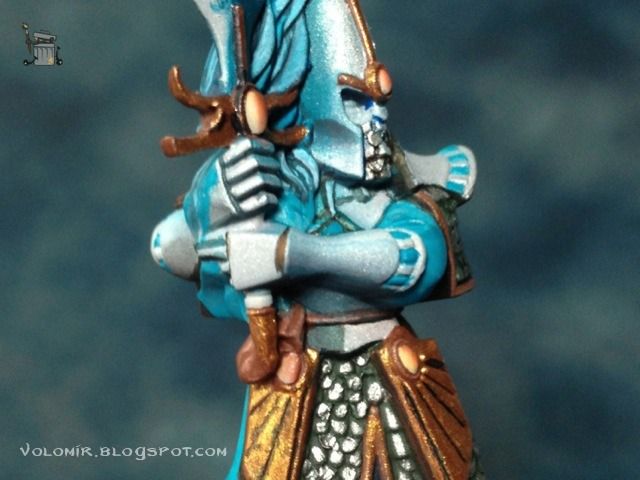
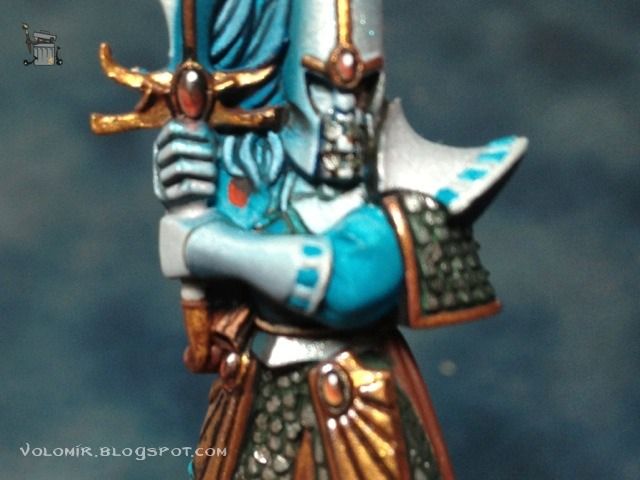
Take a look at the metallic bottom part of the torso, just after that rope that serves as some kind of belt to the elf.
The base was just mithril metal with airbrush. As you can see, the surface is rather dull, not shiny. That is because the airbrush kills gloss. But no problem, that will be an advantage. I will start shading the metal by adding more matt and dark colours. First glazes of navy blue.
I'll continue slowly, step by step with no rush. The important part of metals is to ensure that we keep smooth transitions. So the next few photos each contain a single application of paint, so you can get an idea of how many steps I'm doing. (Forgive me for the photos, they are done quickly with a phone camera).
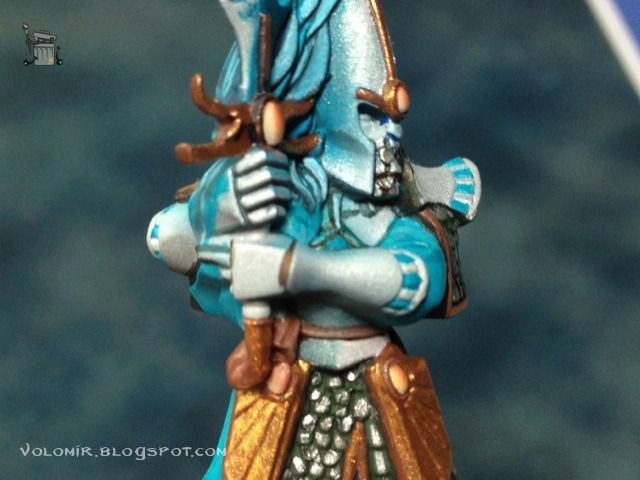
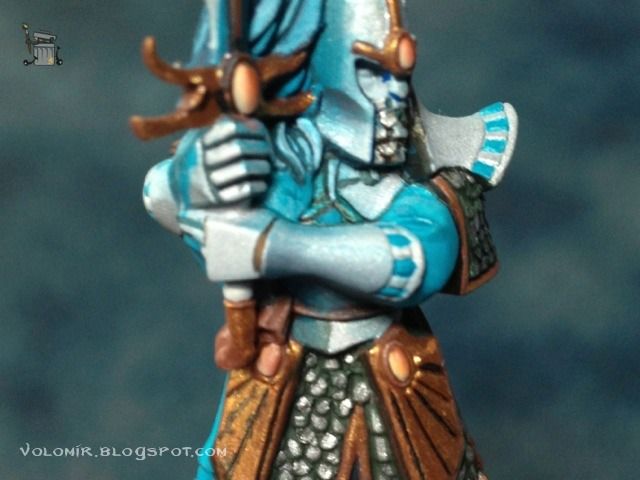
Now that I'm satisfied with the shadows, I can get the gloss back to make the lights shine. Check out the other edge of the metallic armour.
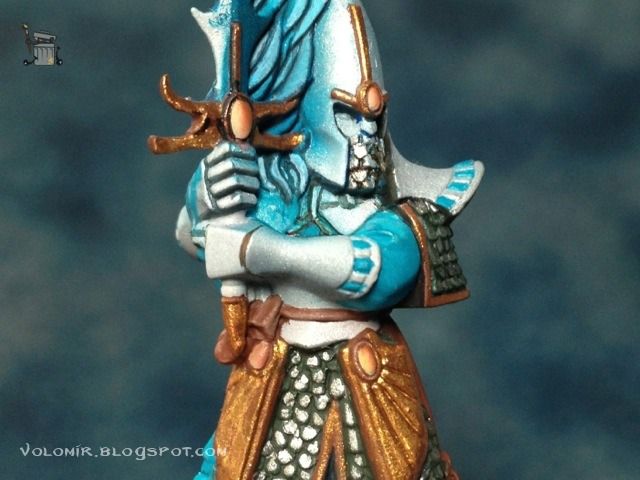
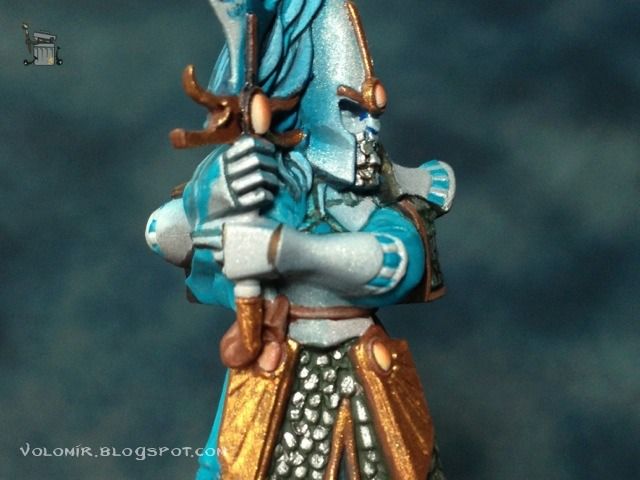
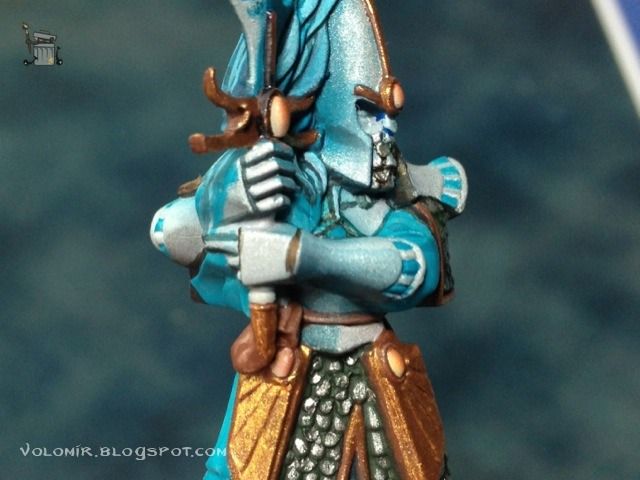
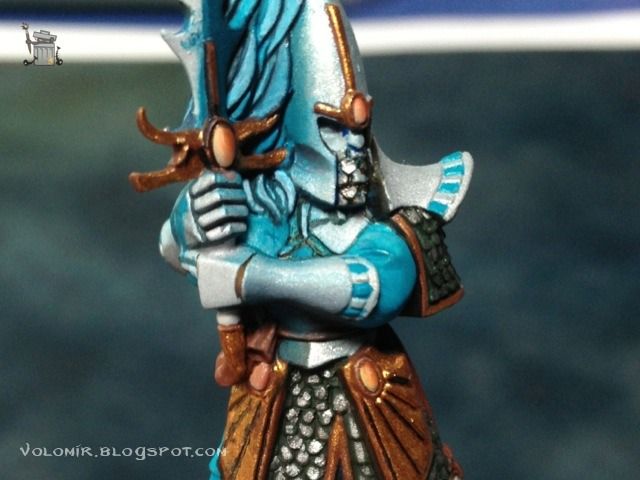
The following photos are very interesting in my opinion. They show how to create volume that does not exist on an otherwise flat area. Check out the circle (at this point blue) surrounded by the hands and hair.
If you take a look at the elf hero of the unit, you'll see that the circle is actually a very nice signet with a gem surrounded by blue and white squares. Well, unfortunately for me, designers of this miniature decided to skip that detail, I guess for production saving purposes, and left it boring plain. Unfortunate, yes, but a very interesting opportunity to show off and have fun. Let's create the feeling that there is indeed a gem and the blue and white squares with just paint.
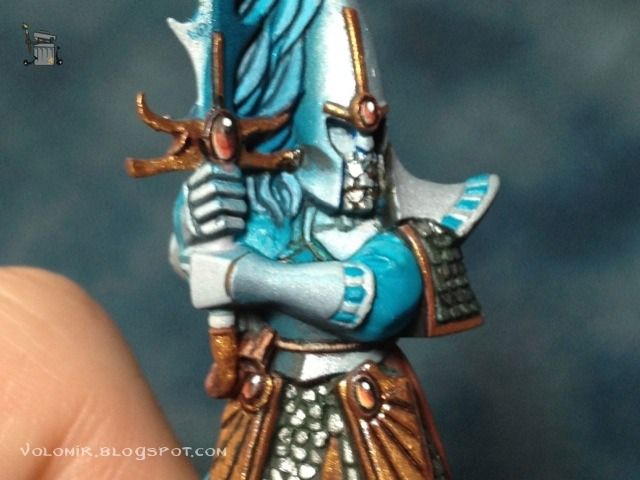
I'll being with by placing a red gem ellipse in the middle, to have an idea of where the elements will be situated.
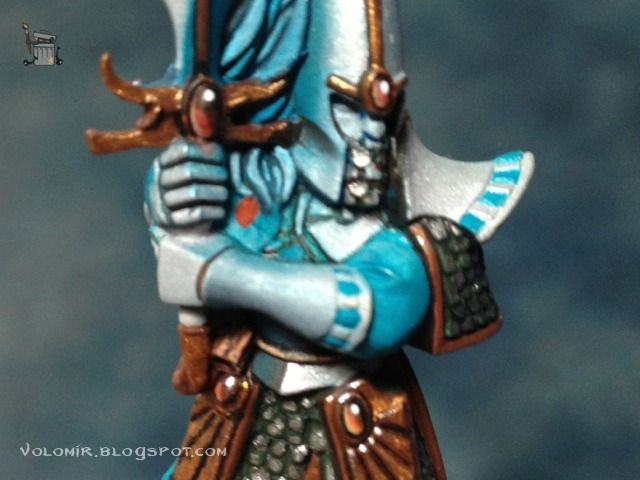
I'll put some black on the top part of the ellipse.
Some little orange on the bottom.
Bottom outline of ice yellow on the ellipse.
The shiny white spot to represent the natural shine of glass.
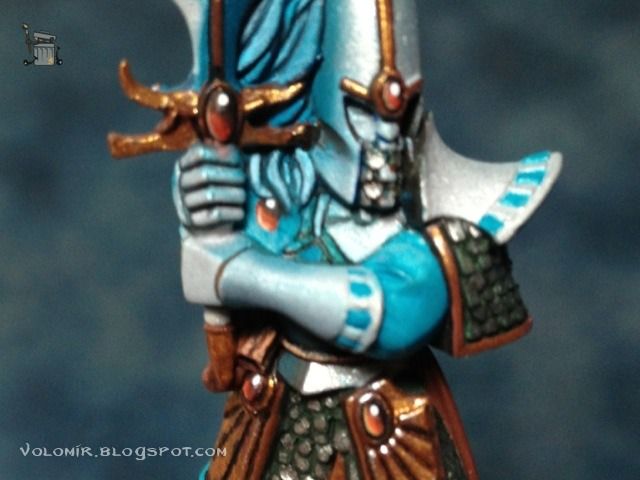
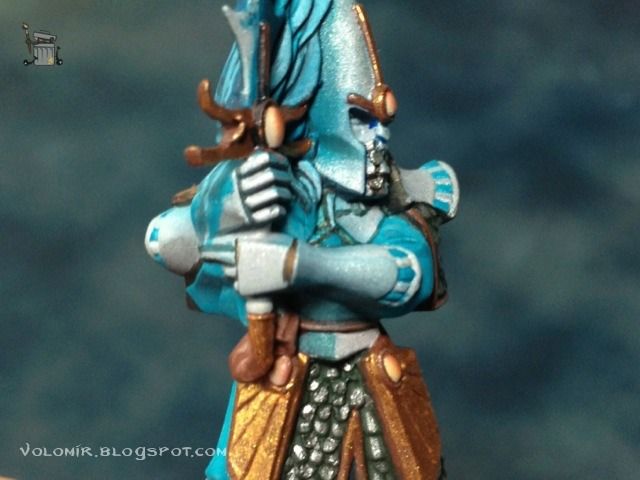
With navy blue, I mark very lightly the squares that surround the gem.
With the same navy blue and a little bit of inks to get intensity, I outline the squares.
White to the squares, and final outlining in general, as well as the tiny metallic rivet that frames the gem and the signet. Voilà!
Isn't it great? I love to do that. Come on sculptors! Take more details out of me! I dare you! Bring it on!!!
Continue to WIP: Swordmasters of Hoeth Part 7
3 comments:
I love your series of step by steps! pretty nice yo see somebody working on his army :) especially if is on this high level.
Thank you Gewaltraton! I'm very excited about this army. It will take very long until I have something decent as an army, but I think I'll get there sometime if I persevere. :)
Great free handing on the gem! I agree, very frustrating when details get left out on minis like this, but as you e noted, sometimes they create fun opportunities to sculpt/paint your own! :)
Post a Comment